
Extending WPGraphQL for Custom Meta Boxes with React and Apollo in a WordPress Theme Tutorial

In the last two tutorials in this series we got up and running with React, GraphQL and Apollo in a WordPress theme. Now we are going to look at how we can extend the WPGraphQL plugin to expose custom meta boxes or meta fields in WordPress.
The example we will do involves adding a “Vote” meta field to WordPress that will eventually allow us to up and down vote WordPress posts in a Reddit style fashion.
You can see the final code we are working from in this repo, which is a TwentyTwenty child theme.
Revealing Custom Meta Boxes in the Gutenberg Block Editor
By default, custom meta boxes will no longer show up when editing posts in WordPress. To enable them we have to go to the options panel in the editor settings.
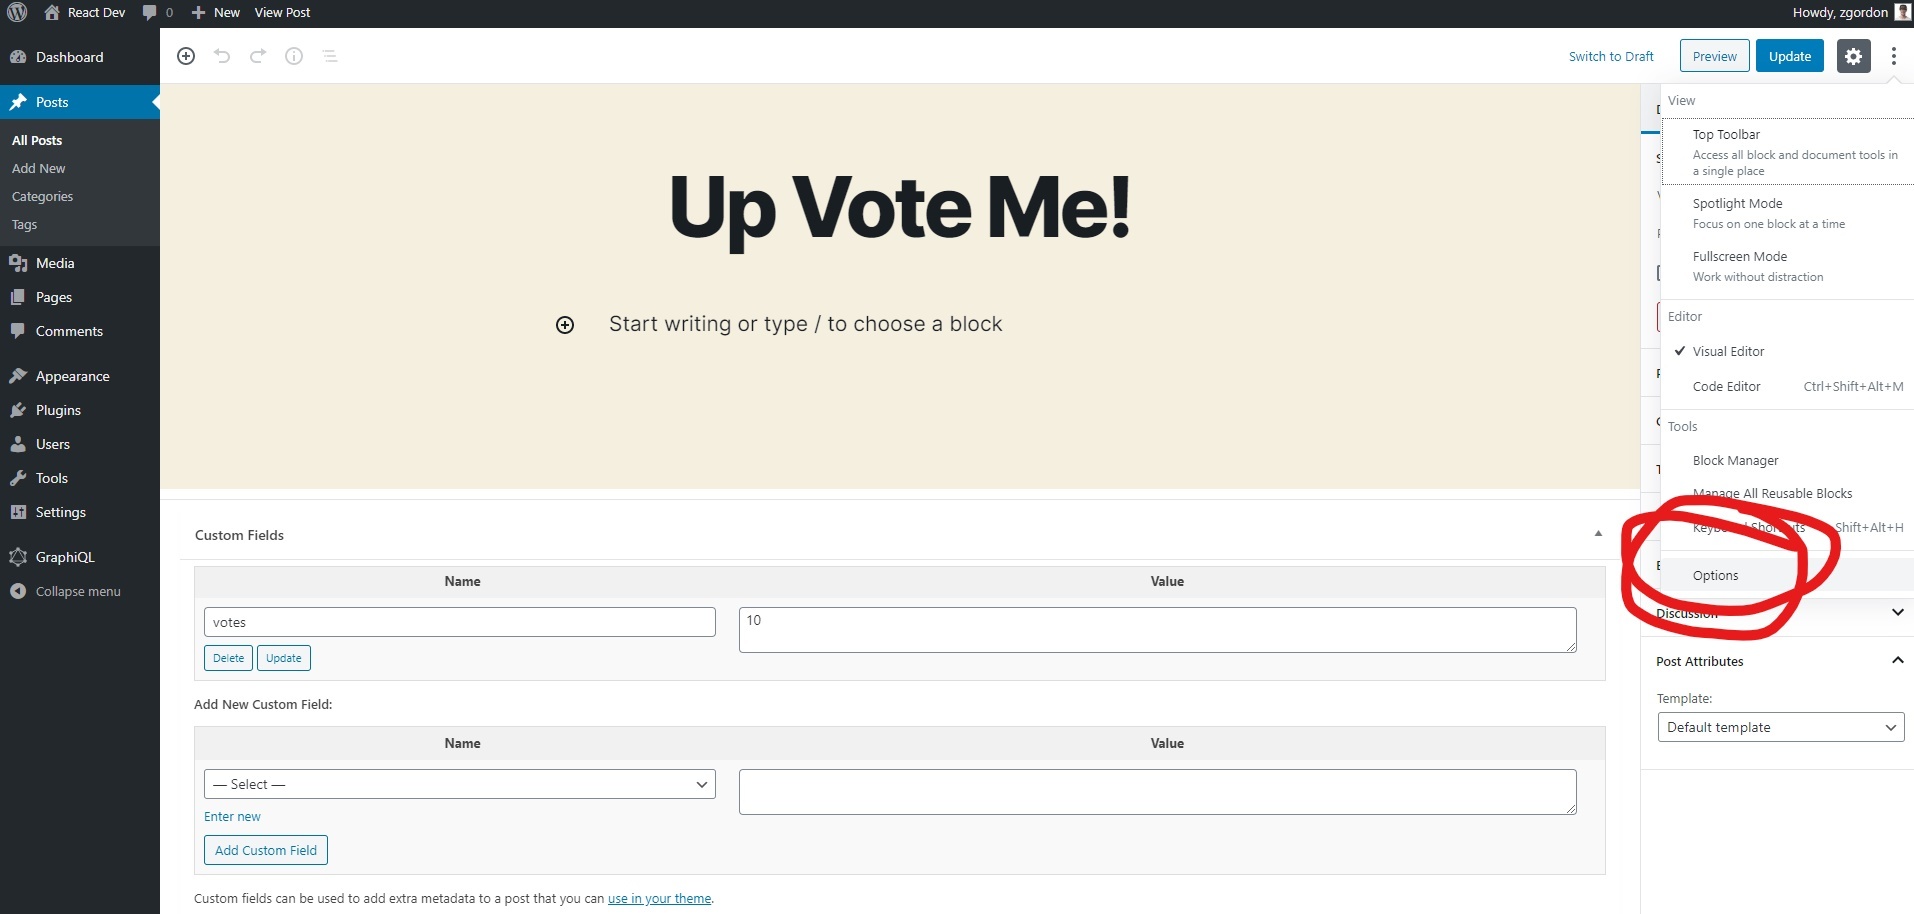
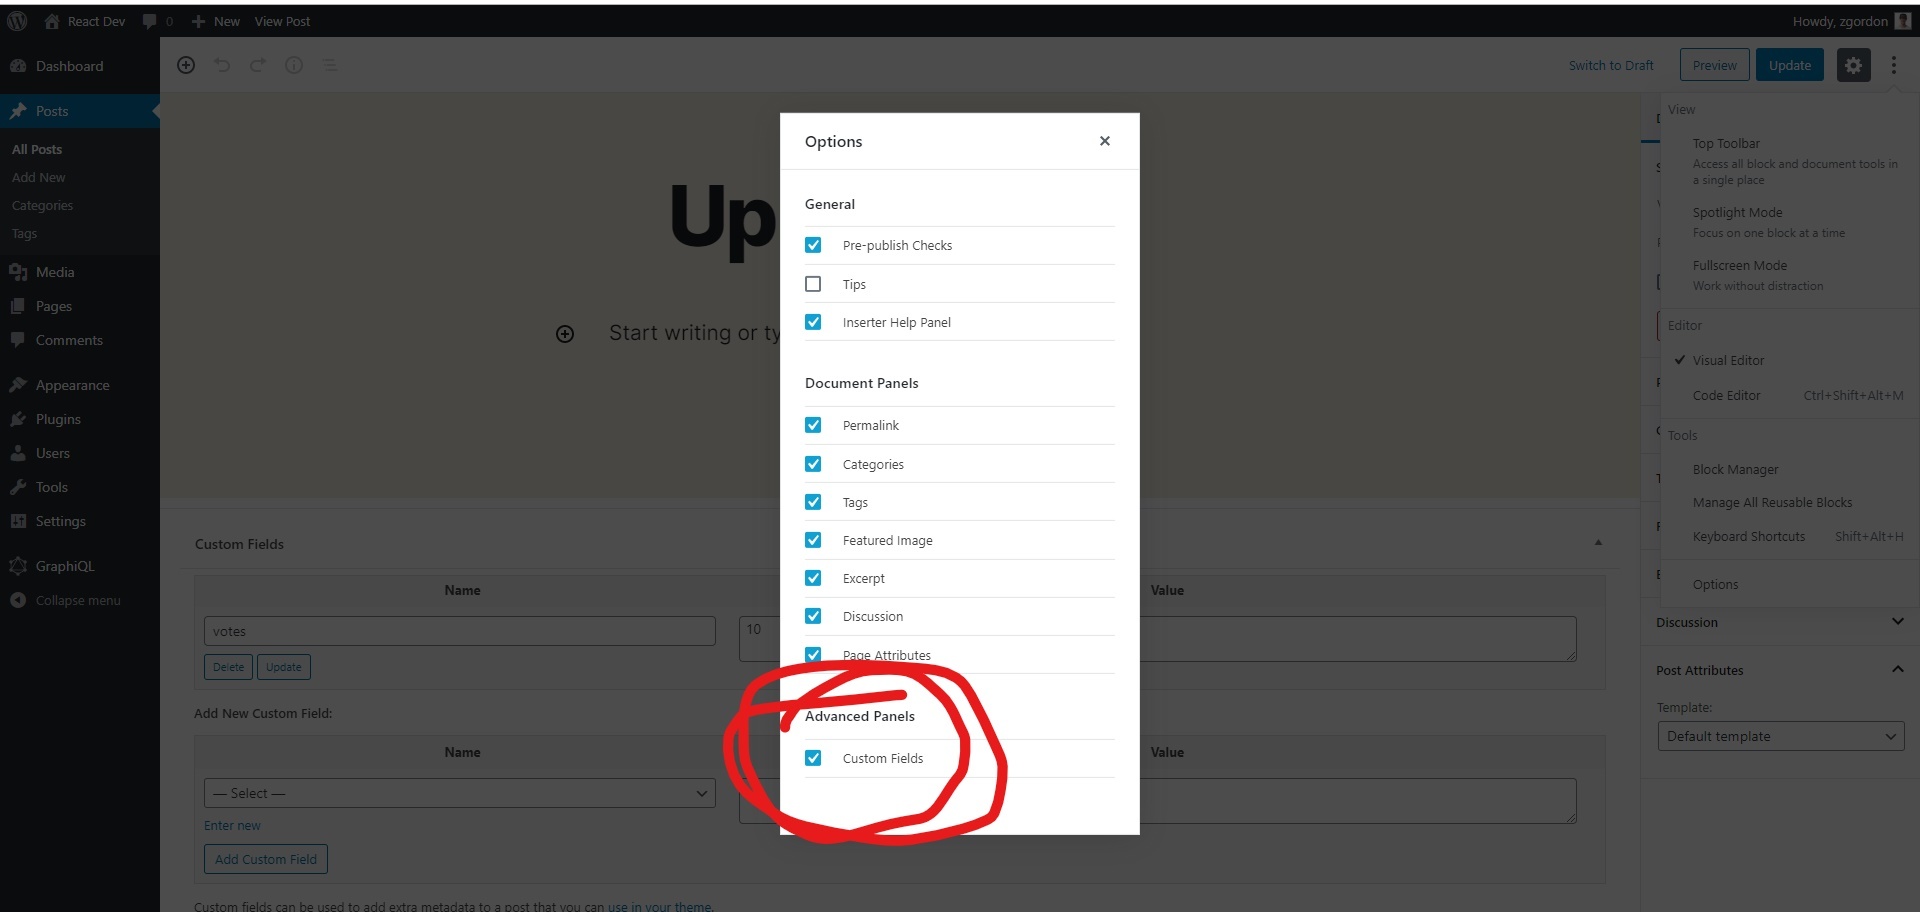
Then you can select to show “Custom Fields.”
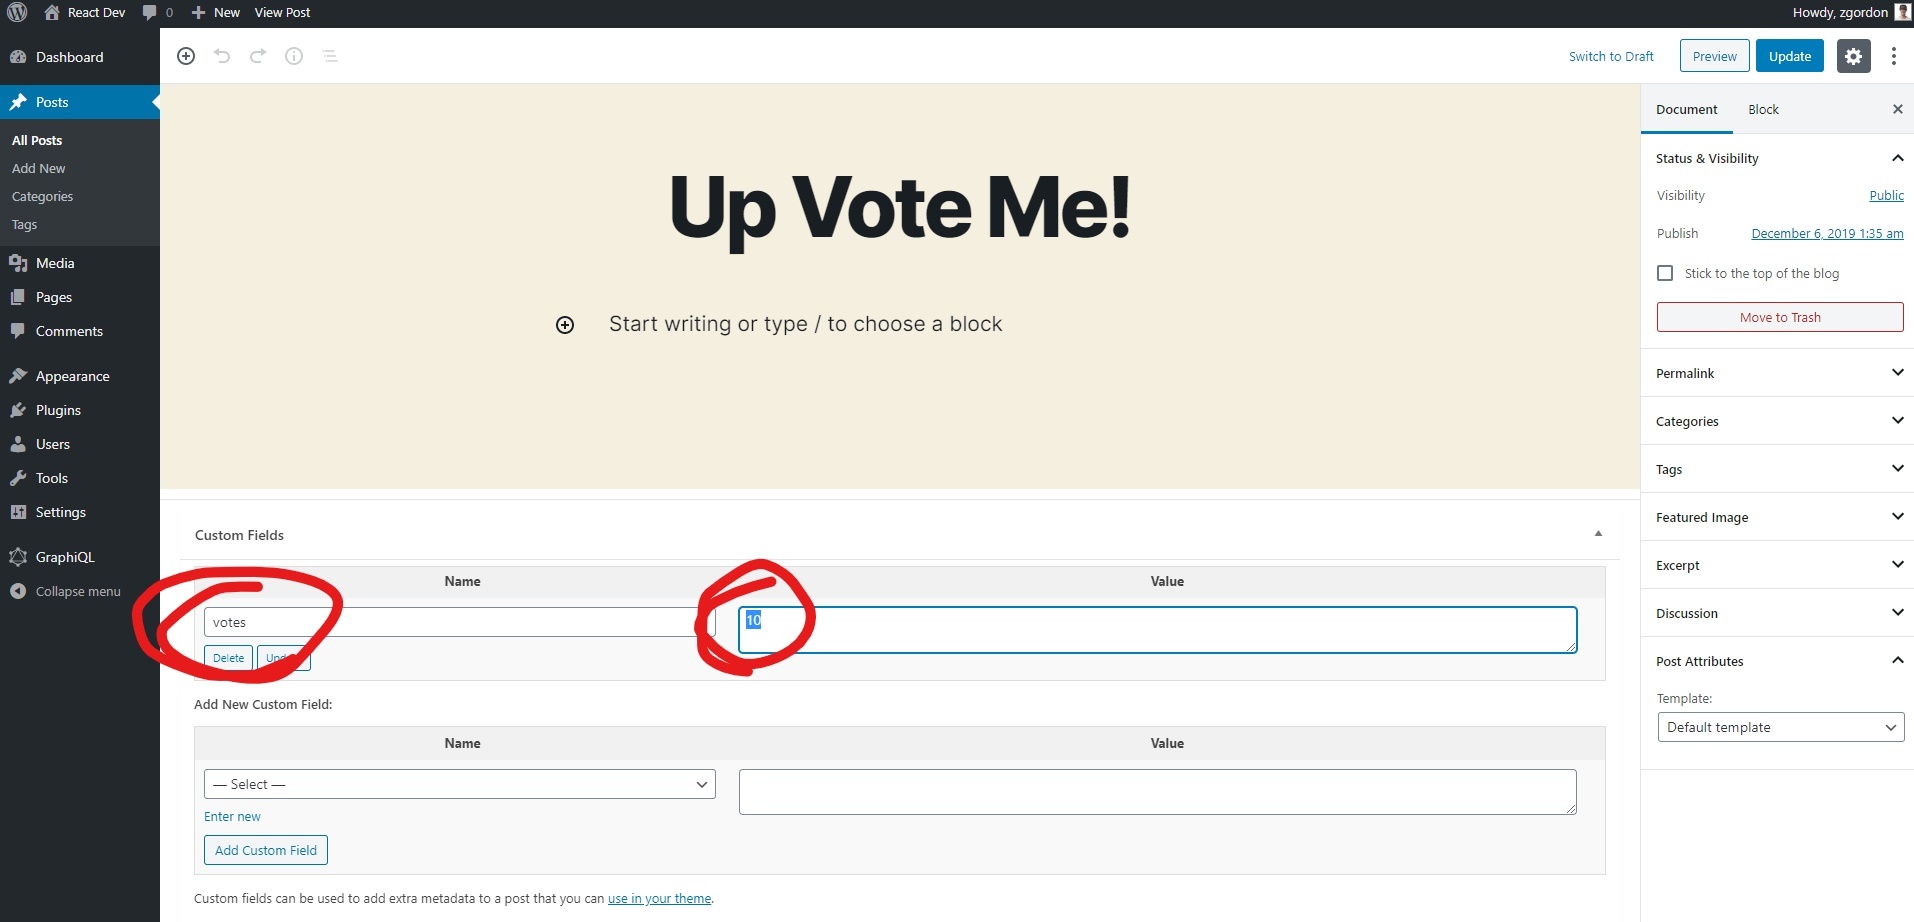
Finally you can add in a custom meta field called “votes” and add a value. I wouls suggest having one post with a vote value of “10” and edit a second post to have a custom “vote” value of “0”. This will give us some different values to work with.
Now that we have these setup in WordPress we can expose them in WPGraphQL.
Exposing Custom Meta Fields in WPGraphQL
Interestingly, custom meta fields are not automatically exposed in WPGraphQL. We have to manually add them.
To do so we a WordPress hook called graphql_register_types along with a custom WPGraphQL function called register_graphql_field().
Together, these look like the following, which you can add to your functions.php file:
// Add Votes to Custom Meta Fields
add_action( 'graphql_register_types', function() {
    register_graphql_field( 'Post', 'votes', [
       'type' => 'Number',
       'description' => __( 'The number of votes', 'wp-graphql' ),
       'resolve' => function( $post ) {
         $votes = get_post_meta( $post->ID, 'votes', true );
         return ! empty( $votes ) ? $votes : 0;
       }
    ] );
} );
What this will do is tell the GraphQL server that we have a meta field called “votes” that we want added to the Posts schema. We add a type and description and then a resolve function.
The resolve function called get_post_meta on our custom “votes” meta field and then returns that value or 0 if there is no value set already.
Technically you don’t need to return a custom meta field here, you can return any custom WordPress data you want. So this is code you can use for other purposes in the future as needed.
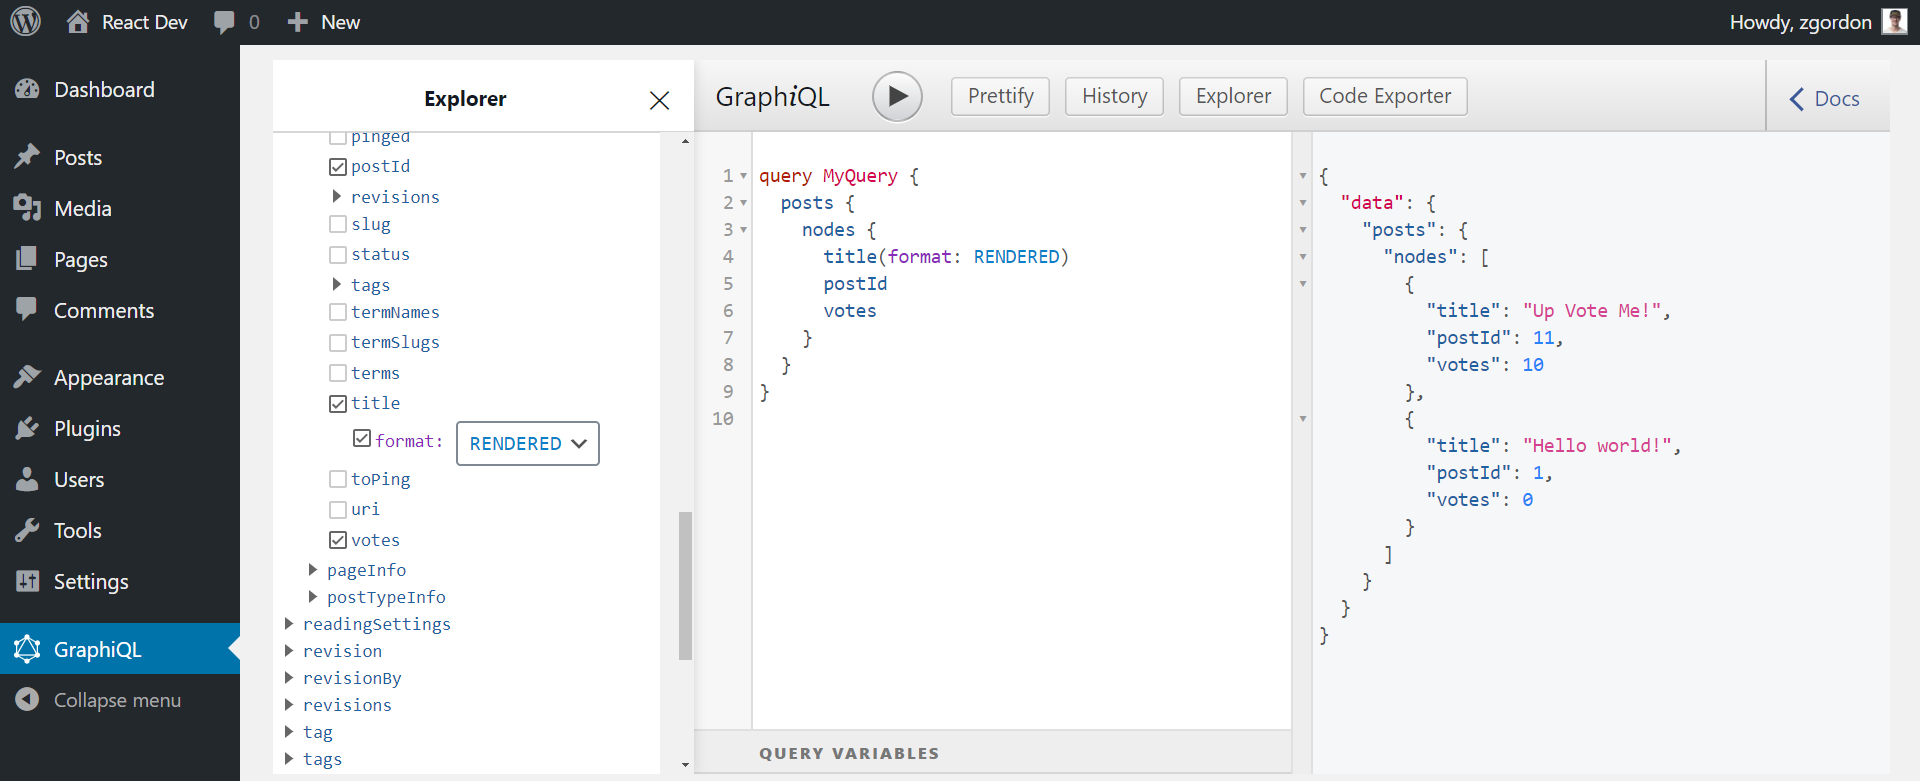
Now when we look in WPGraphiQL we can see the votes field has been added.
Now we can turn our attention back to our custom template code and pull in the custom meta box values.
Querying Custom Meta Boxes with Apollo and React
For this tutorial I’m going to add a new component to our little theme code called “PostsWithVotes.” So our theme JS structure should look like this now:
/src
  /posts-w-votes
    index.js
  /posts
    index.js
  index.js
At the top of our /posts-w-votes/index.js file we’re going to import useQuery and gpl.
import { useQuery } from "@apollo/react-hooks";
import { gql } from "apollo-boost";
Then we can write our GraphQL query to get our posts along with the votes:
const POSTS_QUERY = gql`
  {
    posts {
      nodes {
        id
        title(format: RENDERED)
        votes
      }
    }
  }
`;
Then finally we can write out component itself. It will look very similar to our component from the last part of this series.
However, we are going to sort our posts by the number of votes so the posts with more votes appear first.
const PostsWithVotes = () => {
  const { loading, error, data } = useQuery(POSTS_QUERY);

  if (loading) return <p>Loading posts...</p>;
  if (error) return <p>Error :(</p>;


  const posts = data.posts.nodes;

  const sortedPosts = posts
    .sort((a, b) => a.votes < b.votes)
    .map(({ id, title, votes }) => (
      <li key={id}>
        <div className="actions">
          {votes}
        </div>
        <h3>{title}</h3>
      </li>
    ));
  return <ul id="post-w-votes">{sortedPosts}</ul>;

};

export default PostsWithVotes;
This will cause our posts to display in the order we want. Now we have to load this component in our main index.js file.
Loading the Posts with Votes Component
To see all of this working, open the main src/index.js file and import the PostsWithVotes component:
import PostsWithVotes from "./components/post-w-votes";Then call the component inside the main <App> component:
const { render } = wp.element;
import ApolloClient from "apollo-boost";
import { ApolloProvider } from "@apollo/react-hooks";

import PostsWithVotes from "./components/post-w-votes";

const client = new ApolloClient({
  uri: "http://react-dev.local/graphql"
});

const App = () => {
  return (
    <ApolloProvider client={client}>
      <div>
        <PostsWithVotes />
      </div>
    </ApolloProvider>
  );
};
render(<App />, document.getElementById(`react-app`));
You should now see the posts show up on the page using our custom template. The posts should also appear in the order of those with most votes first.
Before we wrap up, we will add in and style the buttons that will eventually allow us to vote on the posts.
Adding Up and Down Vote Buttons
For our buttons we are going to use the WordPress <Button> component.
To make these available in our theme, we have to update our enqueueing code in our functions.php file.
wp_enqueue_script(
  'my-theme-frontend',
  get_stylesheet_directory_uri() . '/build/index.js',
  ['wp-element', 'wp-components'],
  time(), //For production use wp_get_theme()->get('Version')
  true
);
Notice that we have included wp-components as a dependency. This will ensure that we can use any of the WordPress React components, like the <Button> component.
Now at the top of our file “import” the <Button> component from the wp.components library in the global window object.
const { Button } = wp.components;Then we can update the markup inside of <div className="actions"> to include two buttons:
<div className="actions">
  <Button onClick={() => upVote(votes)}>˄</Button>
  {votes}
  <Button onClick={() => downVote(votes)}>˅</Button>
</div>
And we will also include a mock upVote and downVote function like this:
const upVote = votes => {
  console.log(votes + 1);
};
const downVote = votes => {
  console.log(votes - 1);
};
Now when we click on the buttons we should see the next value for the vote displayed in the console. In the next tutorial in the series we will look at how to modify the actual value in the database.
To make everything look a little nicer, add the follow styles into the theme style.css file.
#post-w-votes {
  margin: 0;
  padding: 0;
}
#post-w-votes li {
  display: flex;
  margin: 1rem 0 2rem;
  position: relative;
}
#post-w-votes .actions {
  width: 50px;
  flex-direction: column;
  text-align: center;
}
#post-w-votes .actions button {
  width: 100%;
  padding: 0.5rem 1rem;
  margin: 0;
}
#post-w-votes .actions button:hover {
  text-decoration: none;
}
.entry-content #post-w-votes h3 {
  margin: 0 0 0 70px;
  position: absolute;
  top: 50%;
  transform: translateY(-50%);
  vertical-align: middle;
}
This should give us something that looks like this:
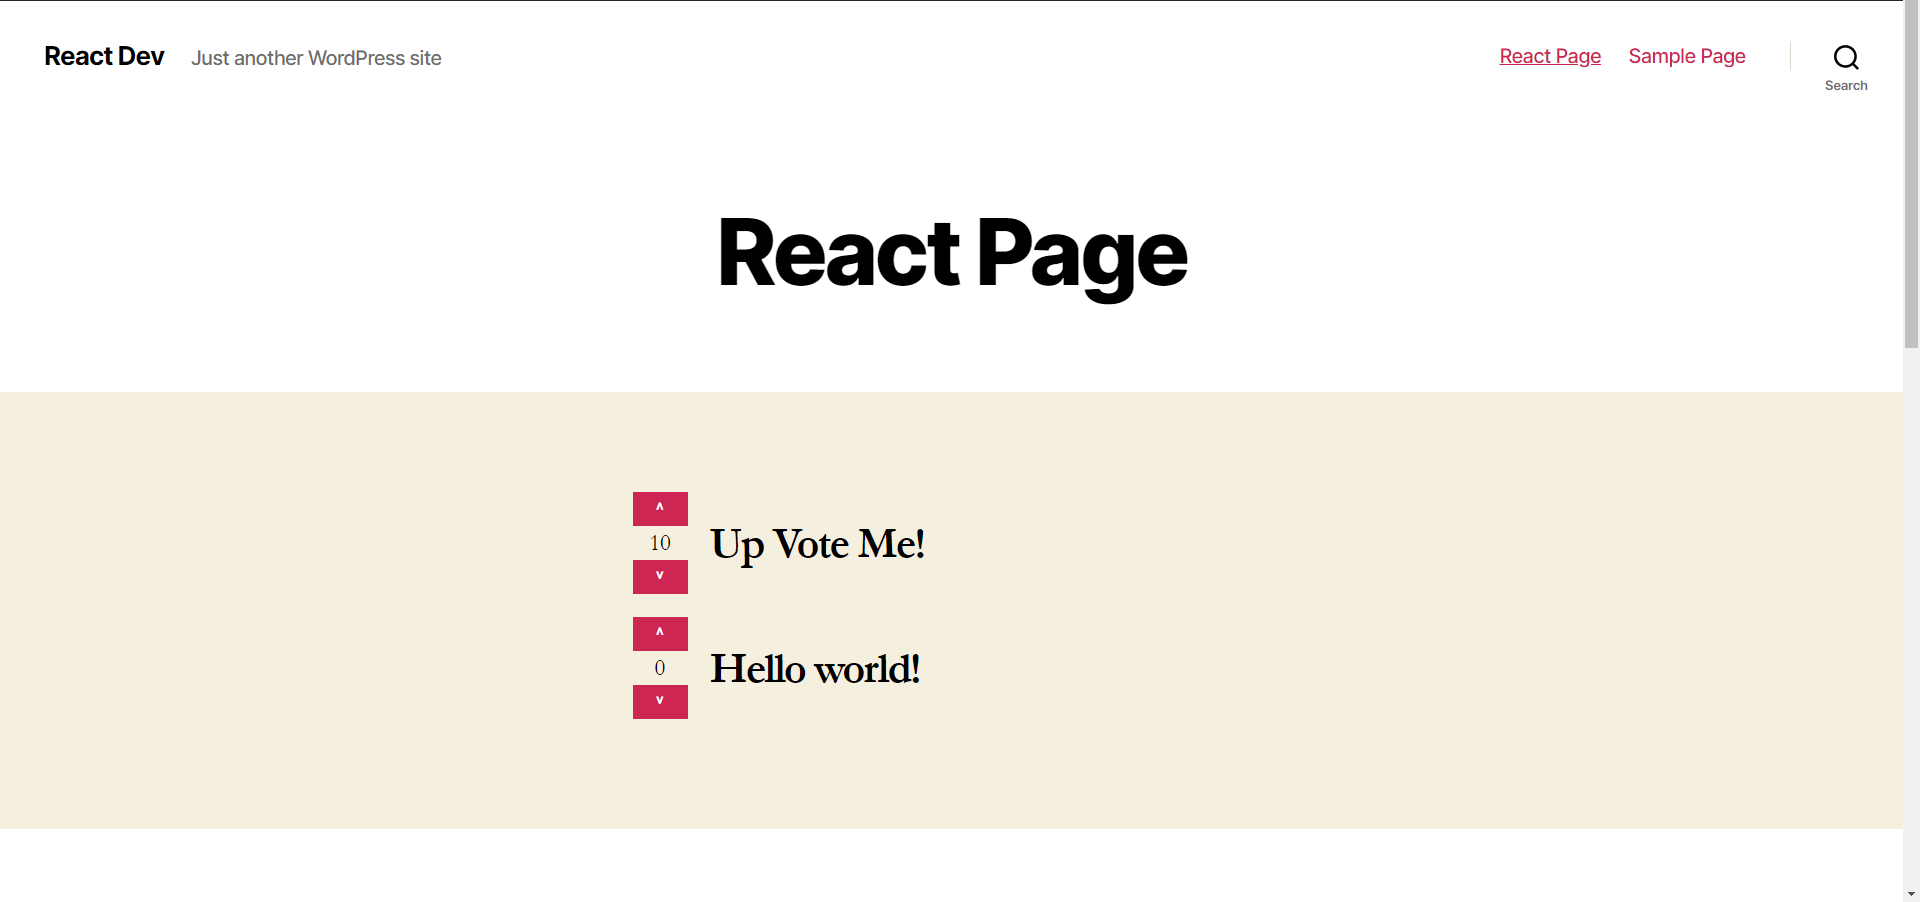
The Final Code for our PostsWithVotes Component
Here is the final code we have for our PostsWithVotes Component:
const { Button } = wp.components;

import { useQuery } from "@apollo/react-hooks";
import { gql } from "apollo-boost";

const POSTS_QUERY = gql`
  {
    posts {
      nodes {
        id
        title(format: RENDERED)
        votes
      }
    }
  }
`;

const upVote = votes => {
  console.log(votes + 1);
};
const downVote = votes => {
  console.log(votes - 1);
};

const PostsWithVotes = () => {
  const { loading, error, data } = useQuery(POSTS_QUERY);

  if (loading) return <p>Loading posts...</p>;
  if (error) return <p>Error :(</p>;


  const posts = data.posts.nodes;

  const sortedPosts = posts
    .sort((a, b) => a.votes < b.votes)
    .map(({ id, title, votes }) => (
      <li key={id}>
        <div className="actions">
          <Button onClick={() => upVote(votes)}>˄</Button>
          {votes}
          <Button onClick={() => downVote(votes)}>˅</Button>
        </div>
        <h3>{title}</h3>
      </li>
    ));
  return <ul id="post-w-votes">{sortedPosts}</ul>;
};

export default PostsWithVotes;
We are coming along nicely here! We have votes hooked up to WPGraphQL, we have the votes pulled in through Apollo and React, and we have some buttons mocked up ready to send the data back to WordPress.
In the next part of this series we will use GraphQL mutations to update the values of the buttons when we click on them.
Here is the final code we are working from.
Hello, This is great and useful do you know how to approach the Mutation part as well?
Like the custom field post with ACF and then do create Post Mutation with the custom fields.
Bests
Hoping to create a follow up article on this when I have the time! Mutations are covered in my Gatsby and WordPress course tho if you want to check that out!