3 – A Day of REST Conference Theme – Customizing
In the previous section we explored what an ‘out of the box’ setup of the Feeling Restful theme was like and what steps were needed. But how often do we really use a WordPress theme, or a default site plan, ‘as is’?
Before we start altering this theme you might want to install React Developer Tools for Chrome or Firefox.
By the time you start customizing this theme I recommend having already done your information architecture homework to come up with a site plan, so you know what your menus are going to be, and an understanding of what custom post types you’ll be using.
Adding your own custom post types and fields to the theme
Custom Post Types
Before you start making changes to the JavaScript you’ll need to use terminal to navigate to the theme folder then run:
grunt webpack:watch-dev # build javascript
Open feelingrestful-theme in your favourite text editor and navigate to feelingrestful-theme/dist/main.js line 135 this is where we’ll make adjustments to the default routes. When you crack open the file you’ll see that there are already routes created but they are very specific to the purpose of feelingrestful.com which was a site for a specific event. Unless you’re going to have speakers and sponsors, too, you can probably get rid of those. If you want to change News to Blog or something else, you can change the route here then we’ll change the menu.
var routes = _react2['default'].createElement(
		_reduxRouter.ReduxRouter,
		null,
		_react2['default'].createElement(
			_reactRouter.Route,
			{ path: '/', component: AppWithReduxConnected },
			_react2['default'].createElement(_reactRouter.Route, { path: '/page/:slug', component: (0, _reactRedux.connect)(function (state) {
					return state;
				})(_componentsPagesPage2['default']) }),
			_react2['default'].createElement(_reactRouter.Route, { path: 'speakers', component: (0, _reactRedux.connect)(function (state) {
					return state;
				})(_componentsPagesSpeakers2['default']) }),
			_react2['default'].createElement(_reactRouter.Route, { path: '/speakers/:id', component: (0, _reactRedux.connect)(function (state) {
					return state;
				})(_componentsPagesSpeaker2['default']) }),
			_react2['default'].createElement(_reactRouter.Route, { path: 'sponsors', component: (0, _reactRedux.connect)(function (state) {
					return state;
				})(_componentsPagesSponsors2['default']) }),
			_react2['default'].createElement(_reactRouter.Route, { path: 'news', component: (0, _reactRedux.connect)(function (state) {
					return state;
				})(_componentsPagesPosts2['default']) }),
			_react2['default'].createElement(_reactRouter.Route, { path: 'news/:slug', component: (0, _reactRedux.connect)(function (state) {
					return state;
				})(_componentsPagesPost2['default']) }),
			_react2['default'].createElement(_reactRouter.Route, { path: '', component: (0, _reactRedux.connect)(function (state) {
					return state;
				})(_componentsPagesIntro2['default']) })
		)
	);
Custom Fields
This theme does not make use of the Customizer API so if you go to Appearance → Customize you will see the most basic of options and, trust me, neither the menus nor the static page options will do anything for you.
Adjusting the menu
Before you start making changes to the JavaScript you’ll need to use terminal to navigate to the theme folder then run:
grunt webpack:watch-dev # build javascript
Navigate to feelingrestful-theme/dist/main.js line 38,055 (ish) and you’ll see where the menu is defined
function menu(state, action) {
		if (state === undefined) state = {};

		return {
			items: [{
				name: "Home",
				url: "/"
			}, {
				name: "About",
				url: "/page/about/"
			}, {
				name: "Speakers",
				url: "/speakers/"
			}, {
				name: "Schedule",
				url: "/news/schedule/"
			}, {
				name: "News",
				url: "/news/"
			}, {
				name: "Sponsors",
				url: "/sponsors/"
			}, {
				name: "Hack Day",
				url: "/page/hack-day/"
			}, {
				name: "Press",
				url: "/page/press/"
			}, {
				name: "Contact",
				url: "/page/contact/"
			}]
		};
	}
Your menu paths should correlate to the routing you set up.
Now that you’ve adjusted one menu variable you have to adjust another, over at:
feelingrestful-theme/js/reducers.js line 42
function menu( state = {}, action ) {
	return {
		items: [
			{
				name: "Home",
				url: "/"
			},
			{
				name: "About",
				url: "/page/about/"
			},
			{
				name: "Speakers",
				url: "/speakers/"
			},
			{
				name: "Schedule",
				url: "/news/schedule/"
			},
			{
				name: "News",
				url: "/news/"
			},
			{
				name: "Sponsors",
				url: "/sponsors/"
			},
			{
				name: "Hack Day",
				url: "/page/hack-day/"
			},
			{
				name: "Press",
				url: "/page/press/"
			},
			{
				name: "Contact",
				url: "/page/contact/"
			}
		]
	}
}
Adjusting the Appearance
Before you start making edits to the sass files you’ll need to go to your terminal and run:
grunt watch sass # compile sass
Main.scss is where you’ll find some defined variables

The $primary colour variable changes the colour of the menus. Change it to green and see what happens.

The $sec colour variable controls the colour of the API console bar along the bottom of the page. Change it to pink to see what happens.

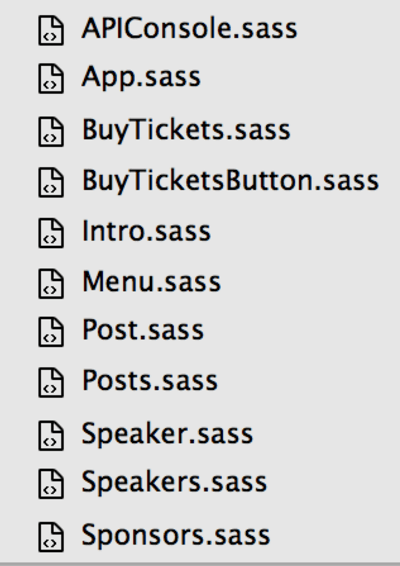
The sass component files are organized and logical and very easy to navigate and figure out what needs to change.
This isn’t a deep dive into customizing the theme but it should be enough to get you started.